Dust Off the Cobia Tackle

No reports have filtered in yet about manta rays swimming off the beaches south of Port Canaveral. But the water temperature will soon hit the 68-72 degree mark, so they can’t be far off. When the rays show up, so do the cobia.

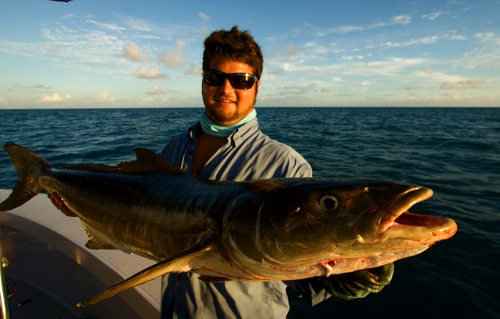
Cobia are fairly large fish. They follow the rays, swimming with them as the rays slowly migrate north. They could be as close as a half mile or as many as 10 or 12 miles off the beach. Cobia may also be found around sea turtles, weedlines, buoys and other flotsam, or even free swimming.

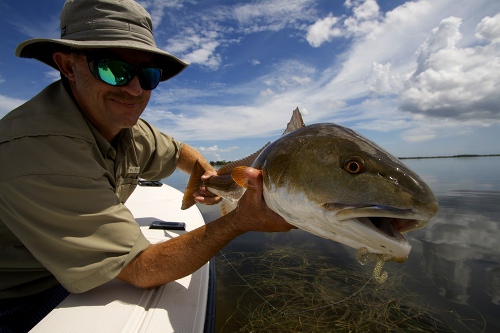
If the water temperature hits 72 degrees, cobia will frequently be right at the surface in 40 to 60 feet of water. If the light is good these fish are clearly visible to anyone who is looking for them. The average fish caught out of Port Canaveral weighs between 20 and 30 pounds, but of course smaller ones, and larger ones, are caught every year.

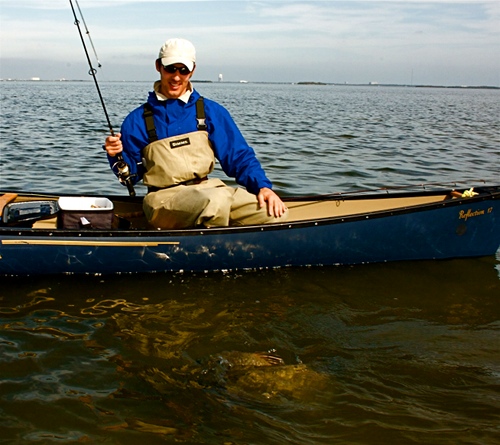
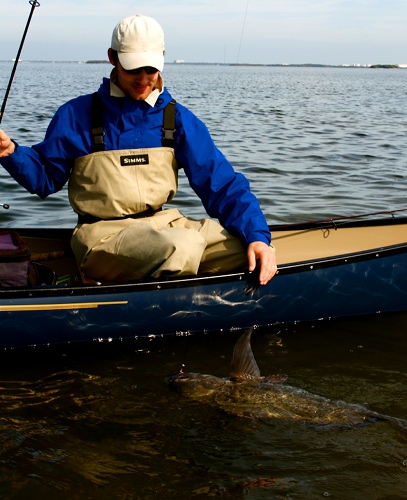
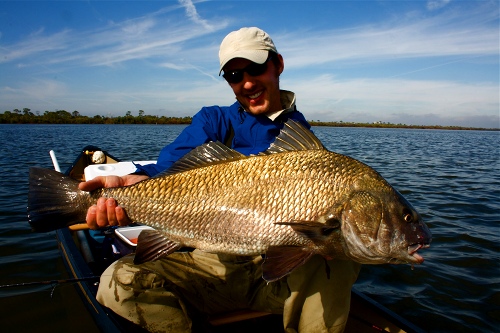
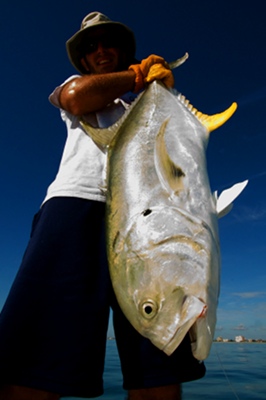
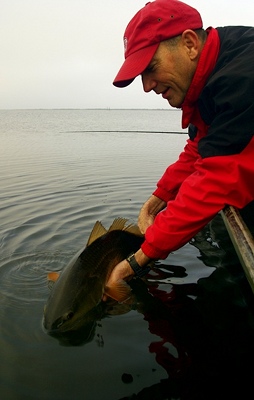
a fish like this will make your day

A few years back Rodney Smith and I went out in my Maverick Mirage on a perfect March day. We saw no mantas, no weeds, no flotsam of any kind. We were two or three miles off of Patrick Air Force Base idling around somewhat aimlessly in what I thought would be a fruitless search for fish. Then I spotted one cruising slowly with his fins out of the water. Rodney’s cast was right on. A few minutes later he was ours. We ended up finding six cobes, four of which we hooked, and three of which we caught. We each kept one, and got a nice tripletail (which was also free-swimming) as a little bonus. Not a bad day at all!

Although many different kinds of lures will work, a favorite for Canaveral cobia is a two or three ounce, chartreuse colored jig, tossed with a 20 pound spinning outfit. Use a 40 or 50 pound test fluorocarbon leader. Cast the jig to the side of the ray and let it sink on a tight line. Sometimes the fish will take it on the drop but if they don’t, work it rapidly back to your boat and try again. When one strikes there won’t be any doubt about it. Set the hook hard.

Another excellent and convenient cobia bait is a lively, six inch long shrimp, hooked through the tail with a 3/0 or 4/0 octopus or 5/0 or 7/0 circle hook. Lively is the key word here. Dead shrimp don’t elicit much response.

Cobia are very found of menhaden. If you can net up some pogies and then you find some cobia you’re sure to hook a few. Hook the pogies through the nose using a 3/0 or 4/0 octopus or a 5/0 or 7/0circle hook. Cast to sighted fish and liveline the baits. Refusals are rare.

Other productive cobia baits include live blue crabs and live eels. Live mullet and pinfish will also work. Day in and day out the shrimp are the easiest to obtain and use, and probably work as well as any other live bait.

You can also catch cobia with a fly rod. You need calm seas, and floating weeds are a big plus. With no flotsam, the fish could be at any angle relative to the boat. It’s hard to be ready for a fly rod shot. Weeds concentrate the fish so you only have to look under the weeds. The farther away you spot the fish, the easier it is to get a quality cast to him.

While many anglers gaff these fish when they come alongside, using that technique to boat your fish means you’ll have one very angry fish aboard. For truly big cobia a gaff is indispensable, but more modest specimens can and should be boated with a large landing net. They are much less likely to destroy tackle (or anything else in their way) if they’re not stuck with that big hook.

Cobia have dorsal spines that can inflict painful wounds on the unwary. Be careful when you get one of these fish in the boat. Larger vessels will have fish boxes that the fish will be dropped into, but in a small boat the fish may be simply lying on the deck. Cover such fish with wet towels to keep the sun off of them.

The cobia run only lasts a few weeks. It is a harbinger of the changing seasons, promising the nearshore angler months of great fishing to come. Take advantage of this fishing.

John Kumiski
http://www.spottedtail.com/

All content in this blog, including writing and photos, copyright John Kumiski 2011. All rights are reserved.
Share
|


Kids and Fishing

The package of letters my mailman delivered from Jackson Heights Middle School was a bonus, one in which a hundred sixth graders thanked me for speaking to their classes on career day. One of the letters said, “Mr. Kumiski, I’ve never been fishing. Could you take me some time?”

It is a sad, sad thing when a 12 year old has never had the chance to go fishing. For ten plus years I was a teacher in the Seminole County school system, and there’s a lot of kids who never had the chance to fish, to camp, to hunt, to run around in the woods. I do what I can to get kids out, but there are way more of them than I can accommodate. They need your help.

Every fisherman who reads this knows some kids. They might be relatives or they might be neighbors. Many of them have never fished and are just waiting for you to ask them to go. Be sure to get parental permission before you ask the kids!

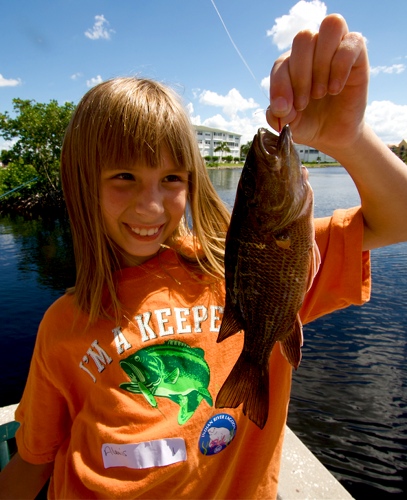
If you take a kid fishing it’s important that you do just that. Don’t bring them with you. Take them fishing. You might not mind waiting five hours to catch one big fish, but most kids will. The younger they are the more true that is. They want action, and little sunnies, catfish, and other less glamorous species fill the bill.

Lots of snacks area good idea, too. If they’re hungry they won’t have fun. Fun is what you’re after here. Don’t get too hung up on catching fish. Take time to watch turtles, dragonflies, and other wonders of nature.

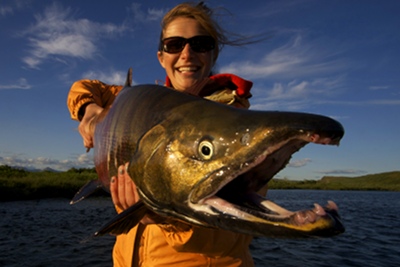
now THAT's what I'm talking about!

Some kids will go and not like it. My son Alex doesn’t care to fish very much. That’s OK. Some kids will love it though, and become treasured fishing partners.

As it turned out, I already knew the family of the boy who wrote the letter mentioned in the first paragraph. I asked his mother if I could take him out, and we went to the Mosquito Lagoon for a four hour trip. Colin caught the first fish of his life, the biggest being a 23 inch redfish, and said, “Hey, this is pretty fun!” He thanked me at least a half dozen times.

The future of fishing needs today’s kids to become tomorrow’s conservationists. You can help by taking a kid fishing soon.

John Kumiski
http://www.spottedtail.com/

All content in this blog, including writing and photos, copyright John Kumiski 2011. All rights are reserved.
Tying the Bunny Booger

Readers familiar with my writings frequently come across references to the Bunny Booger. Some readers write to me wanting to know what it is. Others want to know how to make one. This piece will answer those queries.

A bunny booger is an artificial fly. It’s evolved from a wooly booger, and uses only rabbit fur zonker strips, available at any fly shop or store that sells fly tying supplies. I’m sure other folks tie similar flies and have other names for them.

While here in Florida I mostly use black boogers for reds and black drum, in Alaska we use cerise colored ones for salmon. Exactly the same fly except for color.

I’m sure in brown it would be a more than passable crayfish imitation for bass fishermen.

Materials
– Mustad 3407 #2 or equivalent
-1/50th oz. lead dumbell eye
-bunny zonker strip, color your choice
-danville flat waxed nylon thread

1. Start the thread and tie on the lead eye behind the hook eye. If you intend to tie in a weed guard (recommended) put it back a little farther than you would otherwise.

2. Wind the thread to the bend of the hook. Take a 1″ long piece of bunny strip and tie it in as a tail, fur side down.

3. Take a 4-6″ long bunny strip and, right where you tied the tail in, tie it in like you’d tie in a pair of hackle you intended to Palmer. It should be at right angles to the hook shank, facing away from you, with the fur side up. Wrap the thread up to the lead eye, then Palmer the bunny strip up to the lead eye and tie it off.

4. At this point you either tie in a weed guard and then finish the fly, or just whip finish and cement it right now.

It’s PDS (pretty darned simple) and takes about 5 minutes.

John Kumiski
http://www.spottedtail.com/

All content in this blog, including writing and photos, copyright John Kumiski 2011. All rights are reserved.
Share
|


Sharpening Hooks, Hook Files

Get the Point?

While fishing the other day I went to tie on a chartreuse rattle rouser. There were two in my box. The hook point on one was rolled. Had a file been in my possession it would have been fine, but I didn’t have one with me.

The second fly was dispatched to its watery duties and performed flawlessly for a while. Then I missed a strike. OK, not unusual. Then I missed another. Not a good thing, but not the first time I’d missed two in a row. Then I missed the third. OK, never really got tight on that one. Then the fourth was stuck solidly, and came off.

I pulled the fly in and looked at the hook. The tip of the point had broken off. I was fishing with a blunt! The two flies that were needed for the dark dirty water were not serviceable for lack of a file. Well, duh.

When I got home I tied some more flies, and put a file in my fly bag. Let’s talk files.

My favorite used to be a small, steel mill bastard file. Around saltwater no matter what I tried, and that was quite a few different things, they would rust to uselessness in a month. Toss it out and get a new one. Again. And again. Etcetera.

Dr. Slick makes a pair of stainless files with diamond surfaces. Both are awesome. The four inch version has a fine grit and a medium grit surface. The six incher has a medium grit and coarse grit surface.

They work extremely well and last a long time, even around the brine.

Unfortunately, for them to work you still need to remember to carry it with you.

John Kumiski
http://www.spottedtail.com/

All content in this blog, including writing and photos, copyright John Kumiski 2011. All rights are reserved.
Wind Speed, Water Temperature Keys to Winter Fishing Success

Many factors affect our success at catching the fishies. During the winter months two of the most important are wind speed and water temperature. The two are related to each other.

Millions of American anglers have a website at their disposal that contains a priceless store of up-to-the minute information on wind speed and direction, water level and flow rates, water temperature, and more. It’s called USGS Real Time Water Data. The URL is http://waterdata.usgs.gov/nwis/rt

Use the drop-down menu on the right side of the page to find the monitoring station closest to where you fish. Since mine is at the Haulover Canal, that’s what we’ll use for the following examples. The URL if you’d like to visit that particular page is http://waterdata.usgs.gov/nwis/uv?02248380

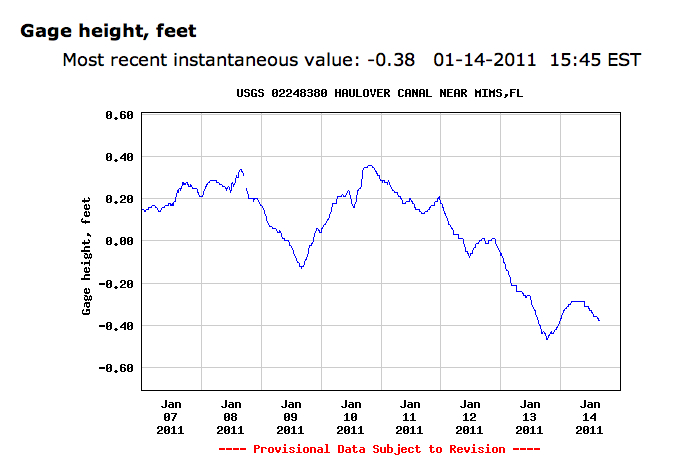
Boaters operating on the shallows of the Indian River or Mosquito Lagoons might like to know the water level before they even leave home. It’s on the website.

You can see from the screen shot that the water has been dropping for several days. That may be due to the hard north winds blowing the water out. At any rate, you know that since the water is so low the fish will have to be concentrated in deeper areas. Many of the flats will be almost dry.

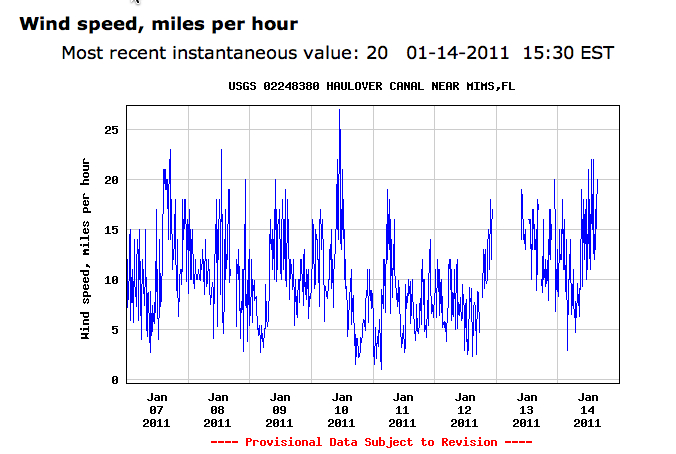
Next, the wind speed for the previous week is shown graphically. The best day of the week to fish was most likely January 12, as the wind speed was between three and twelve miles per hour until quite late in the day. The afternoon of the 11th might have been good, too. On the other hand, on the 10th wind speeds in excess of 25 mph were recorded.

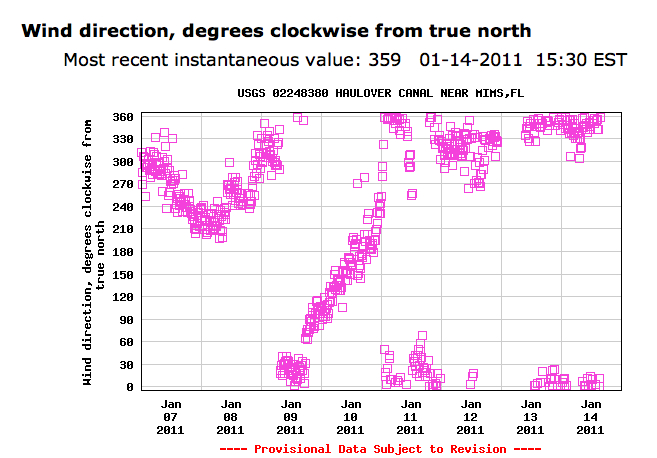
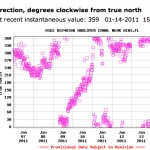
On the wind direction chart you can see that with the exception of January 10 the wind was mostly out of the north or northwest. We haven’t looked at the water temperature yet but we’ve had hard north winds blowing the water out. You could probably predict that the water temperature will be low.

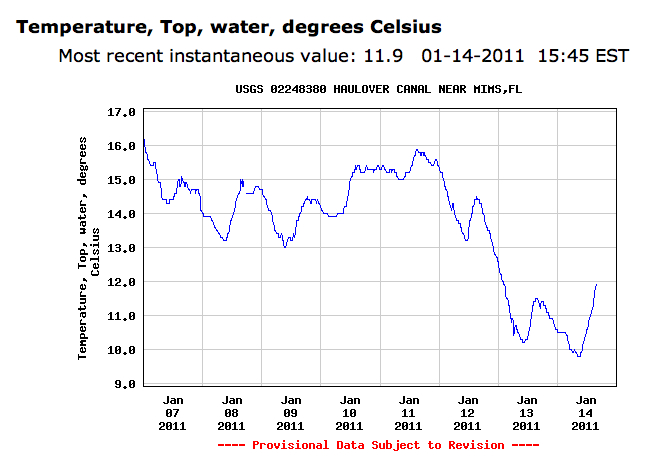
Finally, you can see the water temperature was fairly stable during the early part of the week. On January 12 it started to plummet. Then, on the 14th it went up two degrees Celsius. There is the minor problem of the Celsius to Fahrenheit conversion. If you google “Celsius to Fahrenheit conversion” a number of sites come up to handle this task.

Let’s look at that two degree Celsius temperature rise again on the 14th. That’s about a 3.5 degree Fahrenheit difference. During the winter, regardless of what the starting water temperature is, that much rise in temperature will usually be enough to stimulate our finny friends to start looking for food. Any more warming than that is almost a guarantee they’ll be eating.

Seatrout and redfish both prefer water temperatures in the 70-75 degree Fahrenheit range. Clearly, during the week starting on January 7 it never got close to that.

Any time the water temperatures are falling during the winter months, the fish will seek out thermal refuges. Look for them there! If you look for them on the flats you will be disappointed.

Those thermal refuges are usually devoid of groceries. After sitting in them a couple of days, when the water starts warming the fish are ready to eat. The groceries are on the flats, and that’s where they’ll be looking.

If you’re there too you just may get a few.

All content in this blog, including writing and photos, copyright John Kumiski 2011. All rights are reserved.
Share
|


more big black drum- Orlando area fishing report

The Report from Spotted Tail 1/16/11

Upcoming Events

On January 19 I’ll be speaking to the Tri-County Fly Fishers, the Villages, Florida. Read more here…

On February 3 I start teaching the course, “Fundamentals of Flats Fishing” at Brevard Community College. Read more here…

On February 22 I’ll be speaking to the Florida Fly Fishing Association in Cocoa.

Now for the report-

On Tuesday John Meyer joined me for a no motor zone trip. As we removed the Dagger from the chariot’s roof a low overcast moved slowly above us. At least it was fairly warm, and the wind was low.

We ran over a couple nice redfish right away. Since visibility was so poor I had John start tossing a chartreuse DOA Shrimp. On his third or fourth cast a trout nailed it. It was quickly released.

After spending some time unsuccessfully looking for tailing fish I poled an area where trout had been holding. They were still there. John caught them steadily for an hour or so, nothing spectacular but solid fish in the 18-20 inch range. He got a couple small reds as well.

We stopped for lunch. While we were eating the overcast broke up, and large patches of blue sky appeared. The sun shone, warming the water. Things were looking up.

Following our repast we found a couple large reds tailing. I don’t know if they realized we were there but for whatever reason they stopped showing. We continued on.

A short time later the unmistakable black broom of a drum tail appeared. There’s another! Another, farther away! Yeah, that’s more like it.

John was tossing live shrimp at the fish. A split shot was placed by the hook to increase the sink rate. He had a lot of shots, dozens. He had three bites, and hooked and landed two nice fish.

orlando fishing guide

The fight is almost won...

orlando fishing charter

Ready to come aboard...

orlando fishing trip

The hero shot!

Suddenly the wind came up, 12-15 out of the north. The tails disappeared. Since it was already well into the afternoon, we let it push us back. We did not see a fish the entire way, and in spite of changing lures several times and casting the entire way back John did not get another strike. The boat was back on the roof at 4 PM.

Thursday Karl Dienst and his friend John joined me on Mosquito Lagoon. It was an exercise in futility. The water temperature was 50 degrees. Although the sun was out the air temperature was in the 40s when we launched the boat. The lagoon was cover with whitecaps from a hard and very chilly north wind. The first boat ride almost caused brain freeze.

We saw one trout in the first spot we tried. I couldn’t get into the second spot because the water was too low.

I recrossed the lagoon and fished around several of the spoil islands. At the last spot we tried we saw two redfish and two seatrout.

We tried dunking cut mullet in the canal for about 30 minutes. The baits were not molested in any way shape or form.

It was nice enough being out and the birds were spectacular. As a fishing day, well, it was a waste.

Yesterday Hyram Williams joined me for a day on the Mosquito Lagoon. The weather forecast said high of 69, north winds at 6 mph. The forecast was wrong concerning the wind speed, which was closer to 15.

My optimism for the day was based on the forecast. The water was very low, very clear, and devoid of life in many of the places we checked. Finally about noon time we actually saw some fish and even got a shot. They were only interested in running away from us.

At about 2 PM in yet another spot we found hundreds of fish, apparently all the fish in the lagoon, redfish and black drum mixed. Hyram was throwing a Johnson Minnow. I was stunned by his lack of success.

Finally he got a strike and brought a black drum of 10-12 pounds to the boat. It was the only bite he got.

We worked those fish in the wind for about 45 more minutes and only succeeded in chasing them all away. The boat was back on the trailer at about 330.

Embrace simplicity.

Life is great and I love my work!

Life is short- go fishing!

John Kumiski
http://www.spottedtail.com/

All content in this blog, including writing and photos, copyright John Kumiski 2011. All rights are reserved.
Share
|


Choosing Polarized Sunglasses for Fishing

Choosing Polarized Sunglasses for Fishing

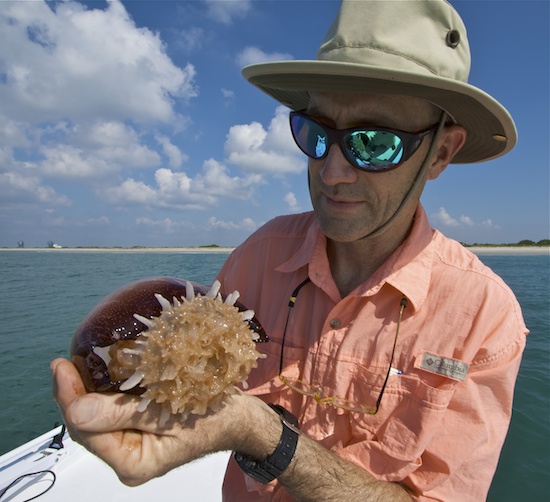
cannonball jelly 2

The process of choosing sunglasses for fishing can be confusing and frustrating. It can also be an adventurous, educational experience- searching, reading, inquiring, trying, feeling, fitting, seeing, looking, and finally, choosing. If you’re aware of just a few important points you can not only make the process fun, but also insure you will actually choose the glasses that will best suit your needs.

A polarizing lens, essential for fishing and highly desirable for driving, acts something like a microscopic set of blinds, eliminating all wavelengths of light that are not parallel to the line of the filters within the lens. By doing so they eliminate glare, making it possible to see into the water, and reduce eyestrain on an angler or driver.

It is essential to understand what the “right” glasses are. Simply put, the best sunglasses are the ones that you will actually want to wear when outdoors.

Drew Simmons of Smith Optics says, “Choosing the right glasses comes down to three things- fit, lens color and material, and frame style and color.”

Fit and comfort are crucial. Take time to try on sunglasses. Consider how they feel. They should be comfortable and secure. If you’re a fisherman they should eliminate most light that might come in from around the periphery of the frame. They should not be sliding down your nose, pinching your temples, or hurting your ears. A high performing, UV blocking lens does not protect you if it’s not on your face. Your glasses should fit so well that you forget they are there.

Lenses present a more complex topic. First of all, lenses are made of various materials including glass and different types of plastic. Glass is the heaviest, but is also the most scratch resistant. Glass lenses are not shatterproof. If you hit yourself in the face with a jig those glasses could break, with predictably ugly results.

Two types of plastic are used in quality eyewear, polycarbonate and high index plastic. Polycarbonate, the safest material, is 10 times more impact resistant than other materials. It’s also the lightest material weight-wise. High index plastic offers better peripheral vision than does polycarbonate. Both scratch easily and need a coating to increase scratch resistance

The next consideration is lens color. Let us state (somewhat arbitrarily) that there are four basic colors of polarized lenses: dark brown, light brown, green, and gray. Some companies have vermillion, copper, amber, and other colors. These are simply variations of our basic four.

Fishermen never want a green lens. They don’t provide enough contrast under any conditions for spotting fish. Dark brown is best for inshore fishing in bright sunlight.
Light brown lenses are best for inshore fishing in dim light or under overcast conditions. Offshore anglers prefer gray lenses, which eliminate the blue color of the water and let fish “pop.” If you’re wealthy you should have all three. Otherwise pick the color which works best in the conditions under which you normally fish. I wear dark brown lenses, since my prescription lenses dramatically increase the cost of my glasses.

Some companies now offer photochromic lenses that get darker or lighter in response to the intensity of the light hitting them. While these cost more, they make a single pair of glasses more versatile, and may be a better value than two different pairs of glasses.

You make a fashion statement with your frame style and color. While these don’t directly affect the performance of the glasses (except for helping the fit), they do affect how often you’ll wear the glasses. How we see ourselves and how we seek to enhance our appearance is for many the most important factor in maximizing actual use. Take the time to find frames that you really like.

Don’t get distracted by comparing UV performance claims. Any quality pair of sunglasses will have more than adequate UV blockage.

Eyewear manufacturers who make quality sunglasses specifically targeted at anglers include Hobie, Costa del Mar, Smith Optics, Ocean Waves, and Bolle.

The enormous variety of sunglasses available is what allows you to find the best sunglasses for you. Use this to your advantage when Choosing Polarized Sunglasses for Fishing, the ones you’ll always wear when out of doors.

All content in this blog, including writing and photos, copyright John Kumiski 2013. All rights are reserved.
Share
|


Thirteen Lucky Tips for Improving Your Fishing Photography

Thirteen Lucky Tips for Improving Your Fishing Photography

The question frequently comes at me, especially while giving slide shows, “What kind of camera do you use?” These Thirteen Lucky Tips for Improving Your Fishing Photography answers the question, and gives some tips on how to use the stuff besides.

I carry two Canon Rebel XTi bodies. One is fixed with a wide angle Canon 10-22 mm zoom lens, an awesome piece of equipment, used for things I can get close to.

orlando fishing trip

The wide angle lens adds a new twist to the grip and grin!

The other carries a telephoto Canon 70-300 mm zoom lens, likewise simply awesome. Use this for things that are farther away.

orlando fishing guide

The telephoto works well for wildlife…

…and also works well for informal portraits.

I also carry a Canon 18-55 mm zoom lens in my camera bag, mostly for close-up work.

My camera bag is a Simms Dry Creek backpack. It’s lined with pieces of an Ensolite sleeping pad cut to fit the pack. The cameras and lenses are wrapped in towels for protection. While walking or wade fishing the cameras can stay dry on my back, quickly available if an opportunity comes up. I’ve done this for four years now and the pack gives plenty of protection.

Here come the tips. Once you understand what’s happening inside those little black boxes feel free to break these rules.

1a. Set the ISO on the wide angle lens body to 100, and don’t shoot at a shutter speed less than 1/60th of a second.

1b. Set the ISO on the telephoto lens at 400, and don’t shoot slower than 1/300th second.

2. Keep the lenses and the camera sensors clean. A blower brush, a package of lens tissue, and a small bottle of lens cleaner are the minimum maintenance requirements.

3. Regardless of which lens you use, try to fill the frame with the subject.

Fill the frame with the subject. The wide angle lens was used for this shot.

4. Pay attention to the light- direction and quality. Fish and many other things photograph best when the sun is low in the sky. Human faces also photograph well when light is diffuse, such as with high overcast.

Late afternoon light gives beautiful color.

5. Take pictures of people fishing, not just grip and grins. Don’t forget release shots.

Take shots of people fishing.

Take shots of people NOT fishing.

Don’t forget release shots!

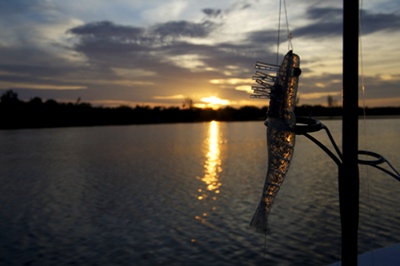
6. Take close-ups of tackle and lures, not just people.

DOA Shrimp

Get shots of tackle and lures.

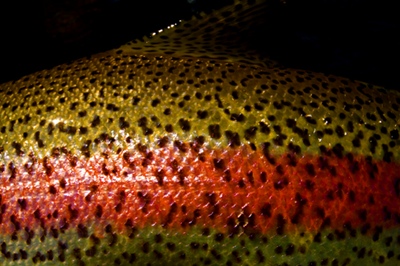
7. Take close-ups of caught fish. Don’t ignore parts that don’t have eyes.

Fish picture- no eyes!

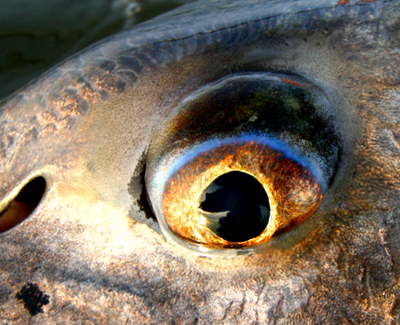
But eyes are OK, too.

8. Focus on eyes of whatever it is you’re photographing if they’re in the frame.

9. Take LOTS of pictures when you get a good opportunity. Usually, one of 20 or 30 is clearly the best.

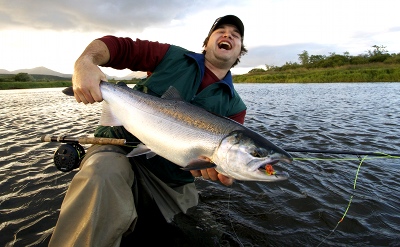
10. When taking grip and grins, have the gripper howl (or some other stupid thing). Sometimes the howling makes the photo. Sometimes the laughter that follows does.

I told Andrew to scream. When he finished he cracked up laughing.

11. Delete any photos that aren’t good. No one wants to go through 95 crappy shots to see the five good ones.

12. Fish can’t breathe when they’re not in the water. If you intend to release the fish do not beat it up!

13. Subjects wearing red or yellow will photograph better than any other color.

If you have other tips not mentioned here (and there are plenty), please feel free to share them with us!

All content in this blog, including writing and photos, copyright John Kumiski 2010. All rights are reserved.
13 Time Saving Tips for Lucky Anglers

orlando fishing, orlando redfishing, orlando fishing tripLucky anglers get that way because they operate efficiently. They recognize opportunities and act decisively when one presents itself. Let’s take a look at 13 tips that when incorporated into you everyday angling routine will make you one of the lucky ones.

1. Keep your spool full with fresh line. You can cast farther when the spool is full. Fresh line is stronger than old line.

2. Don’t use swivels, snaps, or other similar hardware. These devices have some specific uses, but most of the time they just mess up the action of your bait or lure. Keep as little “stuff” on the business end of the line as you can. Try to keep it line-leader-hook.

3. In the same vein, use as little weight as possible. In the lagoons that may mean none at all, or a small shot. In the surf, use the smallest weight that will get the job done.

4. Wear a line clipper on a piece of fishing line around your neck. I hang mine on a piece of fly line. Any time you need to cut your line the right tool is right there.

5. Carry a good pair of pliers. I like the Gerber MultiTool. Keep them in a nylon holster on your belt. Any time you need them they are within easy reach.

6. Keep a dehooker handy. There are many styles, including home-made, but the ARC Dehooker is the best known. The dehooker not only saves you time, it saves the lives of the fish you release. You don’t even need to touch them!

7. A towel kept in your pocket or on your belt will dry and de-slime your hands when touching the bait, fish, or what-have-you becomes necessary.

8. Keep more than one rod handy, each with a different lure rigged. When you want to change lures, simply switch rods, rather than cutting and re-tying.

9. Practice your knot tying until you can tie your favorites blind-folded. You want to tie good knots quickly when you’re surrounded by fish.

10. When using live bait, keep a little dip net handy for pulling it out of the bait well, bucket, or whatever.

11. When searching for fish, use attractor-type lures that make noise, vibrate, have a lot of flash, or all three. Cover as much water as you can!

12. When you’re on spooky species of fish, use subtle baits like jerk baits or the DOA Shrimp. These baits are less likely to scare off spooky fish. Of course, for aggressive fish like bluefish or crevalle the noisy lures will usually be a good thing!

13. Hire a guide. Let them do all work! I’m available! Call me now! 407.977.5207, http://www.spottedtail.com/Rates.htm

Try incorporating these thirteen tips into your daily fishing routine and watch them increase your luck!

John Kumiski
http://www.spottedtail.com

All content in this blog, including writing and photos, copyright John Kumiski 2010. All rights are reserved.